The potatoes for the colcannon took just as long to cook as it took to roast the duck breast on the stove top. This is my first time cooking duck breast. My cousins requested it for Christmas so I hunted around on the internet until I found this recipe in the NY Times Cooking app Peppered Duck Breast with Red Wine Sauce. I felt the sauce was a little flat, so I added a 1/4 teaspoon of Chinese 5-spice powder to it. Zing! Delicious. The duck breast I bought did not have duck tenderloin so I did without. I served the duck with Callaloo Colcannon and something I threw together with veg on hand I call Avocado-Pomegranate Salad.
Peppered Duck Breast in Red Wine Sauce (adapted from NY Times Cooking)
Trim the duck breasts of any excess fat. Score the skin in a diamond pattern but not so deep that you expose the meat underneath. I did so accidentally but no matter! Lightly sprinkle both sides with salt and freshly ground black peppercorns. Place in a casserole dish. Sprinkle over the garlic and thyme, cover the dish and refrigerate at least 1 hour or overnight. Bring to room temperature before cooking.
Make the Red Wine Sauce. Heat 1 tablespoon butter in a saucepan over medium heat. Add the onion and cook until wilted. Stir in the tomato paste and another thyme sprig or 1 teaspoon dried. Cook 1 minute.
Add the broth or bouillon and water. Add 1/4-cup wine, and simmer briskly until the liquid is reduced, leaving 1 1/4-cup sauce, 10 minutes. Remove from heat. Strain sauce and reserve the onion. Return to heat and add 2 tablespoons red wine and 1 tablespoon brandy. Cook 1 minute. Make a slurry out of the potato starch and 2 tablespoons tap water. Stir the slurry into the sauce until thickened; whisk in the remaining tablespoon butter. Taste and season with salt and freshly ground black pepper. If desired, add 1/4 teaspoon Chinese 5-spice powder.
Fry the duck breasts. Remove the garlic and thyme sprigs. Heat a 10 or 12-inch skillet over medium-high heat. When the pan is hot (a drop of water will dance on the surface), place the breasts in the pan skin-side down. Lower heat to medium and cook the breasts 7 minutes or until the skin is golden brown. Using a pair of tongs, flip the breasts over. Cook 3 minutes for rare and 5 minutes for medium rare. Transfer to a platter and let rest 10 minutes. Slice the breasts crosswise, about 1/8 to 1/4-inch thick. Serve with red wine sauce on the side.
Serving Suggestions: Mashed potatoes or Callaloo Colcannon, a creamy mashed potato dish with spinach. I used blanched amaranth (“callaloo” in Jamaica) in place of the spinach. Make a fresh salad to go with. I had an avocado and pomegranates, romaine lettuce, celery, and cilantro.
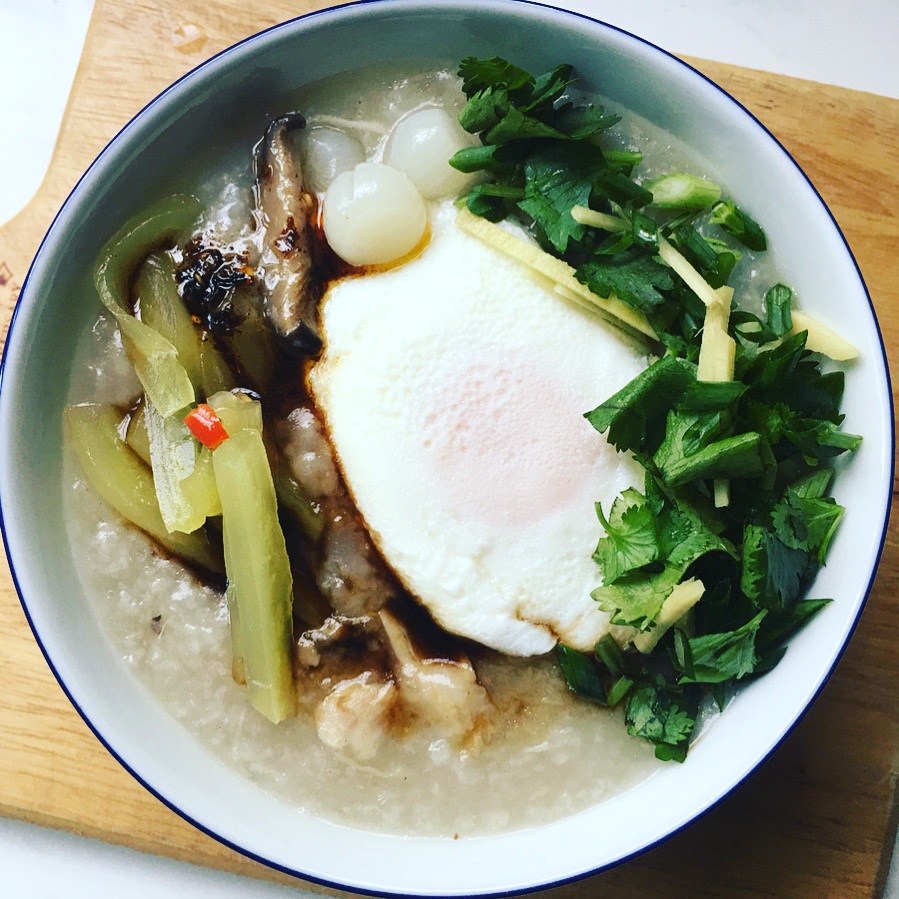
Congee or jook in Hakka is a breakfast staple in Chinese families. Jook also makes a light simple supper. It’s nutritious, a one bowl meal that includes carbs, protein, and vegetables. Very textural, it combines fresh flavours with preserved, so you get crunchy, crispy, salty, tangy, aromatic, and sour all in a spoonful. It takes hours of simmering to get the rice this soft. However, this version was not simmered on the stove but in a slow cooker, thanks to a recipe by Melissa Clark at New York Times Cooking. She uses short grain rice, which I never thought of, and which makes a lot of sense. It’s starchier than long grain rice, and makes a perfect porridge. I recommend smashing the ginger to get a stronger gingery flavour in the rice. Drawback: it takes up to 10 hours to cook before you can sit down and enjoy it. So if you want congee for breakfast, you’ll have to set it the night before. Traditionally in Thailand, joke as it is called here, is served with a raw egg cracked open in the middle of the steaming hot porridge. The heat of the rice coddles the raw egg to an ethereal creamy consistency. However, I think raw eggs are risky so I poached mine. A runny soft egg in congee is delicious.
Congee (adapted from Melissa Clark, NY Times Cooking)
Time: 8-10 hours
Yield: 4 servings
For the Congee:
1/2 cup short-grain rice
6 cups water
1 inch knob of fresh ginger, peeled and smashed
2 shiitake mushroom caps, stemmed
2 chicken thighs, bone in, trimmed of fat with skin removed
White pepper to taste
2-4 poached eggs
For the accompaniments:
1/3 cup pickled vegetables, chopped into bite size pieces
1 tablespoon fried shallots (available in jars at the store)
1 tablespoon fried garlic (available in jars at the store)
1/4 cup diced scallion
1/4 cup diced cilantro
1 tablespoon fresh ginger peeled and slivered
chili oil, to taste (Available in stores, but I recommend Fuchsia Dunlop’s recipe)
Maggi seasoning, to taste (can use low sodium soy sauce instead)
Put rice and water in the ceramic bowl of the slow cooker. Add the ginger, chicken and white pepper. Stir. Cook on high for 1 hour. Skim off any scum and reduce to low. Let simmer 7-9 hours or until the rice has swelled, is soft and mushy, and the water is thickened. Remove the ginger and discard. Remove the mushroom caps and slice into slivers and return to the pot. Remove the chicken and shred with a fork. Return shredded chicken to the pot, discarding bone and gristly parts. Meanwhile, poach eggs. Spoon congee into bowls, top with one egg each per diner, and serve immediately with accompaniments.
Variation:
Make a pork meatball version, another Thai tradition. Season a 1/2 pound of ground pork with salt and pepper. Make small meatballs, about 1 1/2 inches in diameter. One hour before cooking time is up, add the meatballs and cook for 1 hour until no longer pink.
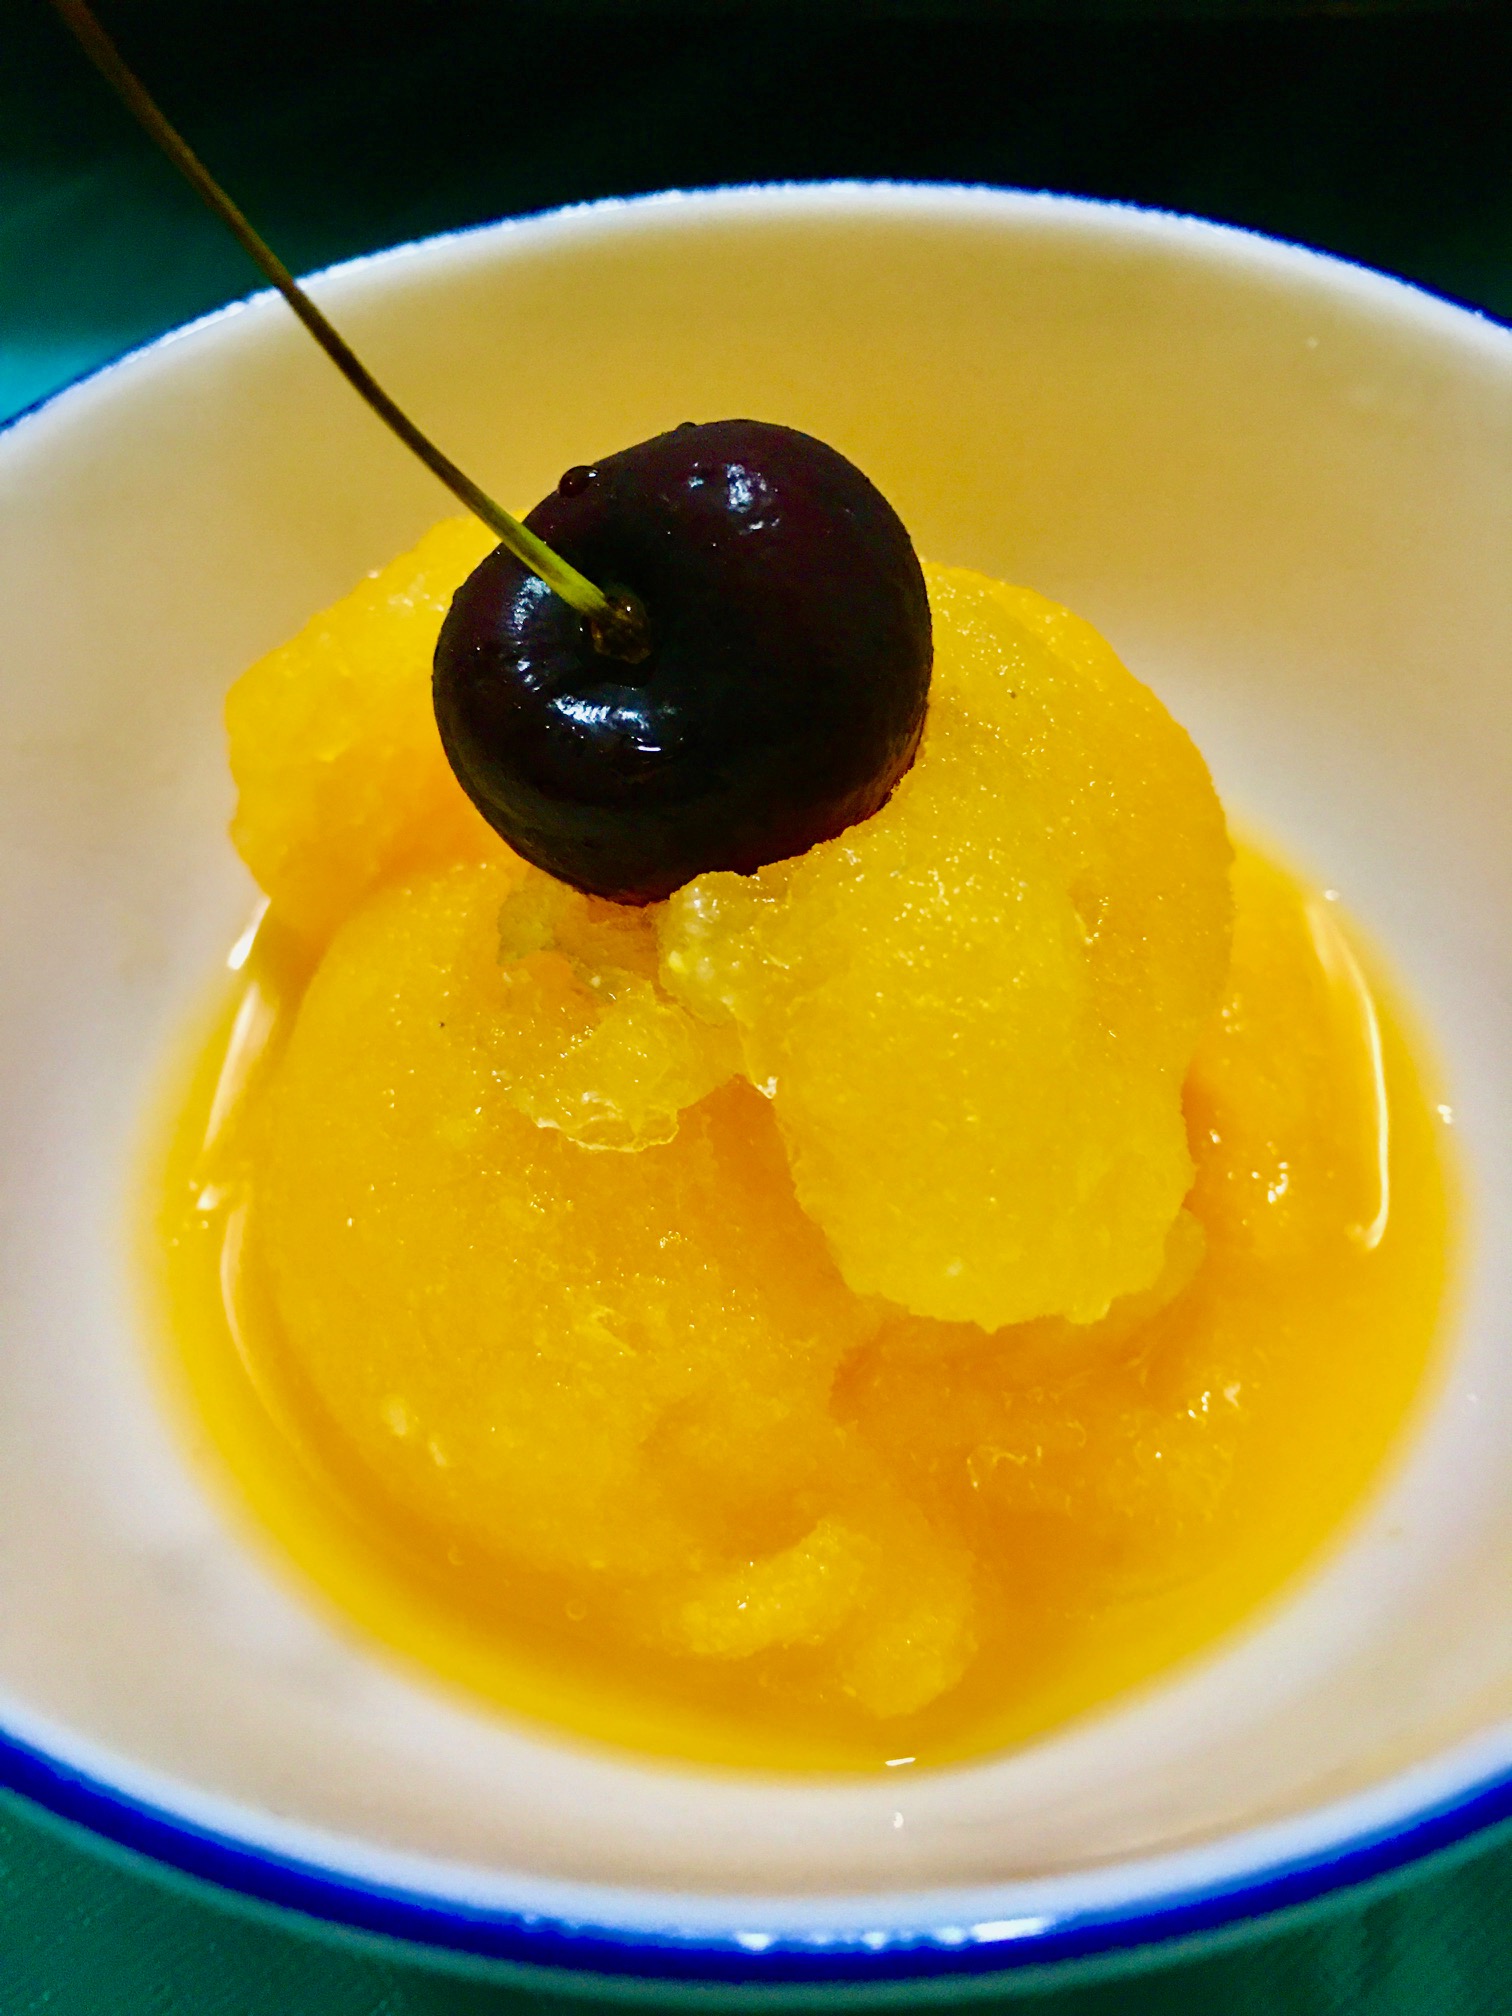
To begin my new year’s resolution for healthier eating, David Tanis (NY Times Cooking) proposes a meal: Miso Chicken in Leek, Ginger, and Scallion Broth, Tofu and Herb Salad with Sesame, and of course, a dessert. This delicious tangerine sorbet has only three ingredients: fresh squeezed tangerine juice, powdered sugar and vodka (I didn’t have sake). Because of the vodka the sorbet wouldn’t freeze, not completely, anyway, I put it in the freezer to harden for several hours. This recipe method is for the KitchenAid ice cream maker.
Tangerine Sorbet (adapted from David Tanis)
Yield 4-6 servings
Time: Suggest 3 days to set up and 1 hour 35 minutes (at least)to make sorbet
3 cups fresh squeezed tangerine juice, with pulp (about 18 small tangerines)
3/4 cup powdered sugar
1/4-1/2 cup vodka (sake in original recipe)
Twenty-four to 48 hours before making the sorbet, put the ice cream maker in the freezer. If you make the sorbet in the morning of the second day, it will be solid enough to enjoy for an after-dinner dessert.
In a blender, combine the juice, sugar, and 1/4 cup vodka. Start out with 1/4 cup vodka to see if the sorbet will freeze in the ice cream maker. Put the mixture in the refrigerator to chill, at least 1 hour.
Set up the ice cream maker and turn on the machine to Level 1. While the dasher is turning, pour the chilled juice mixture into the bowl. Continue churning 20-30 minutes or until the sorbet thickens and can be scooped up in a spoon. Because of the vodka, the sorbet may stay in a liquid state. In that case, put the entire workbowl in the freezer to set up.
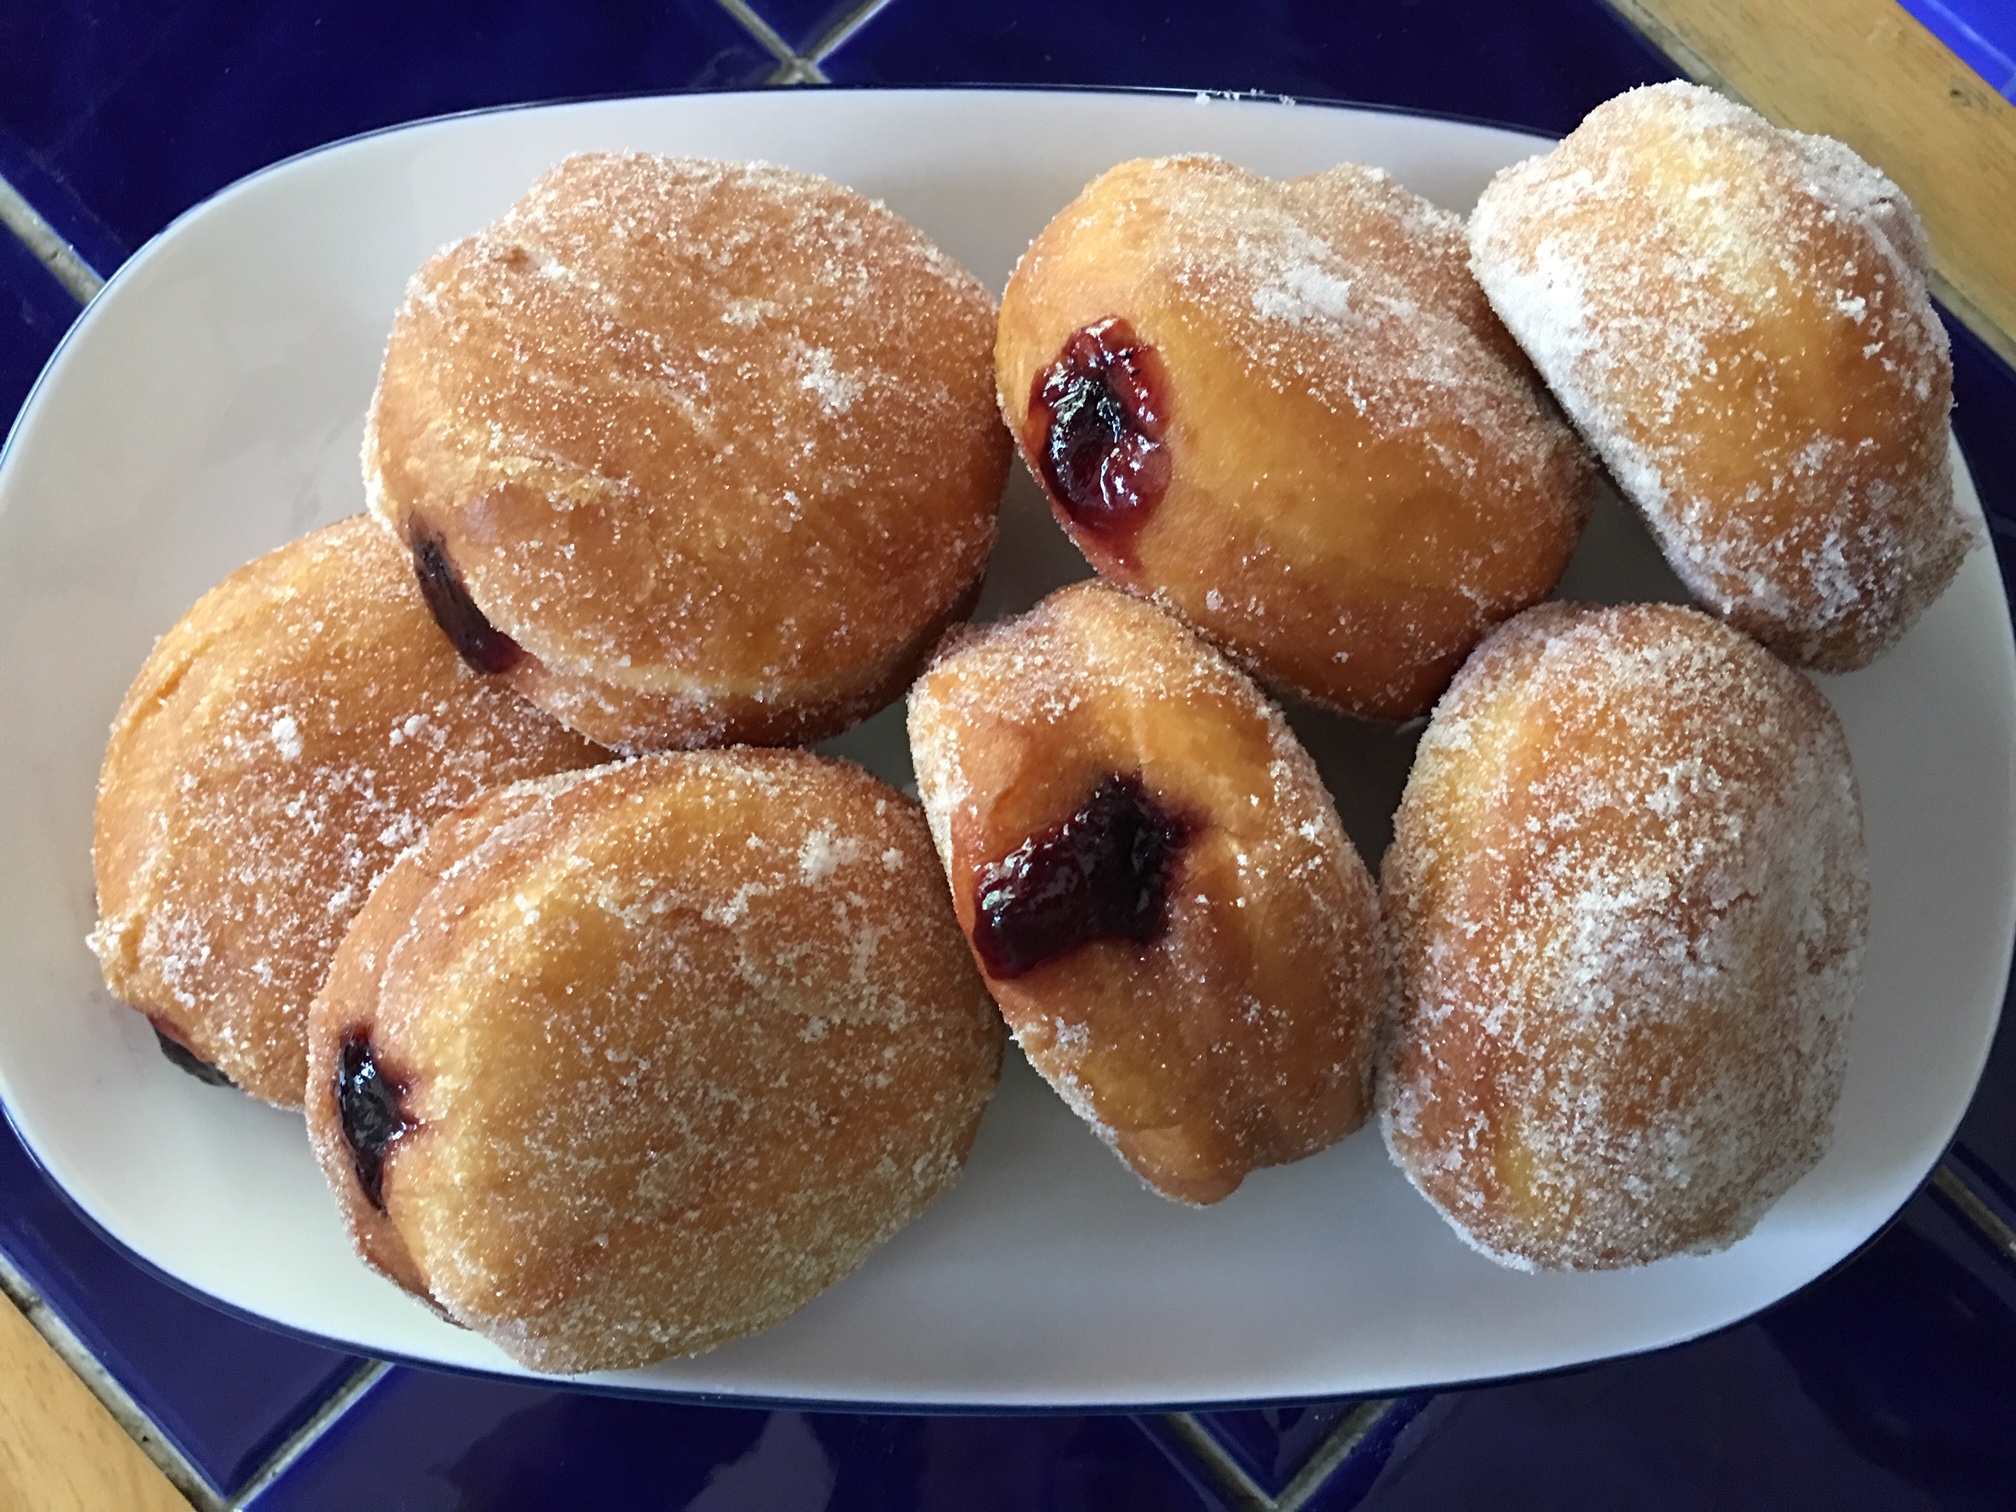
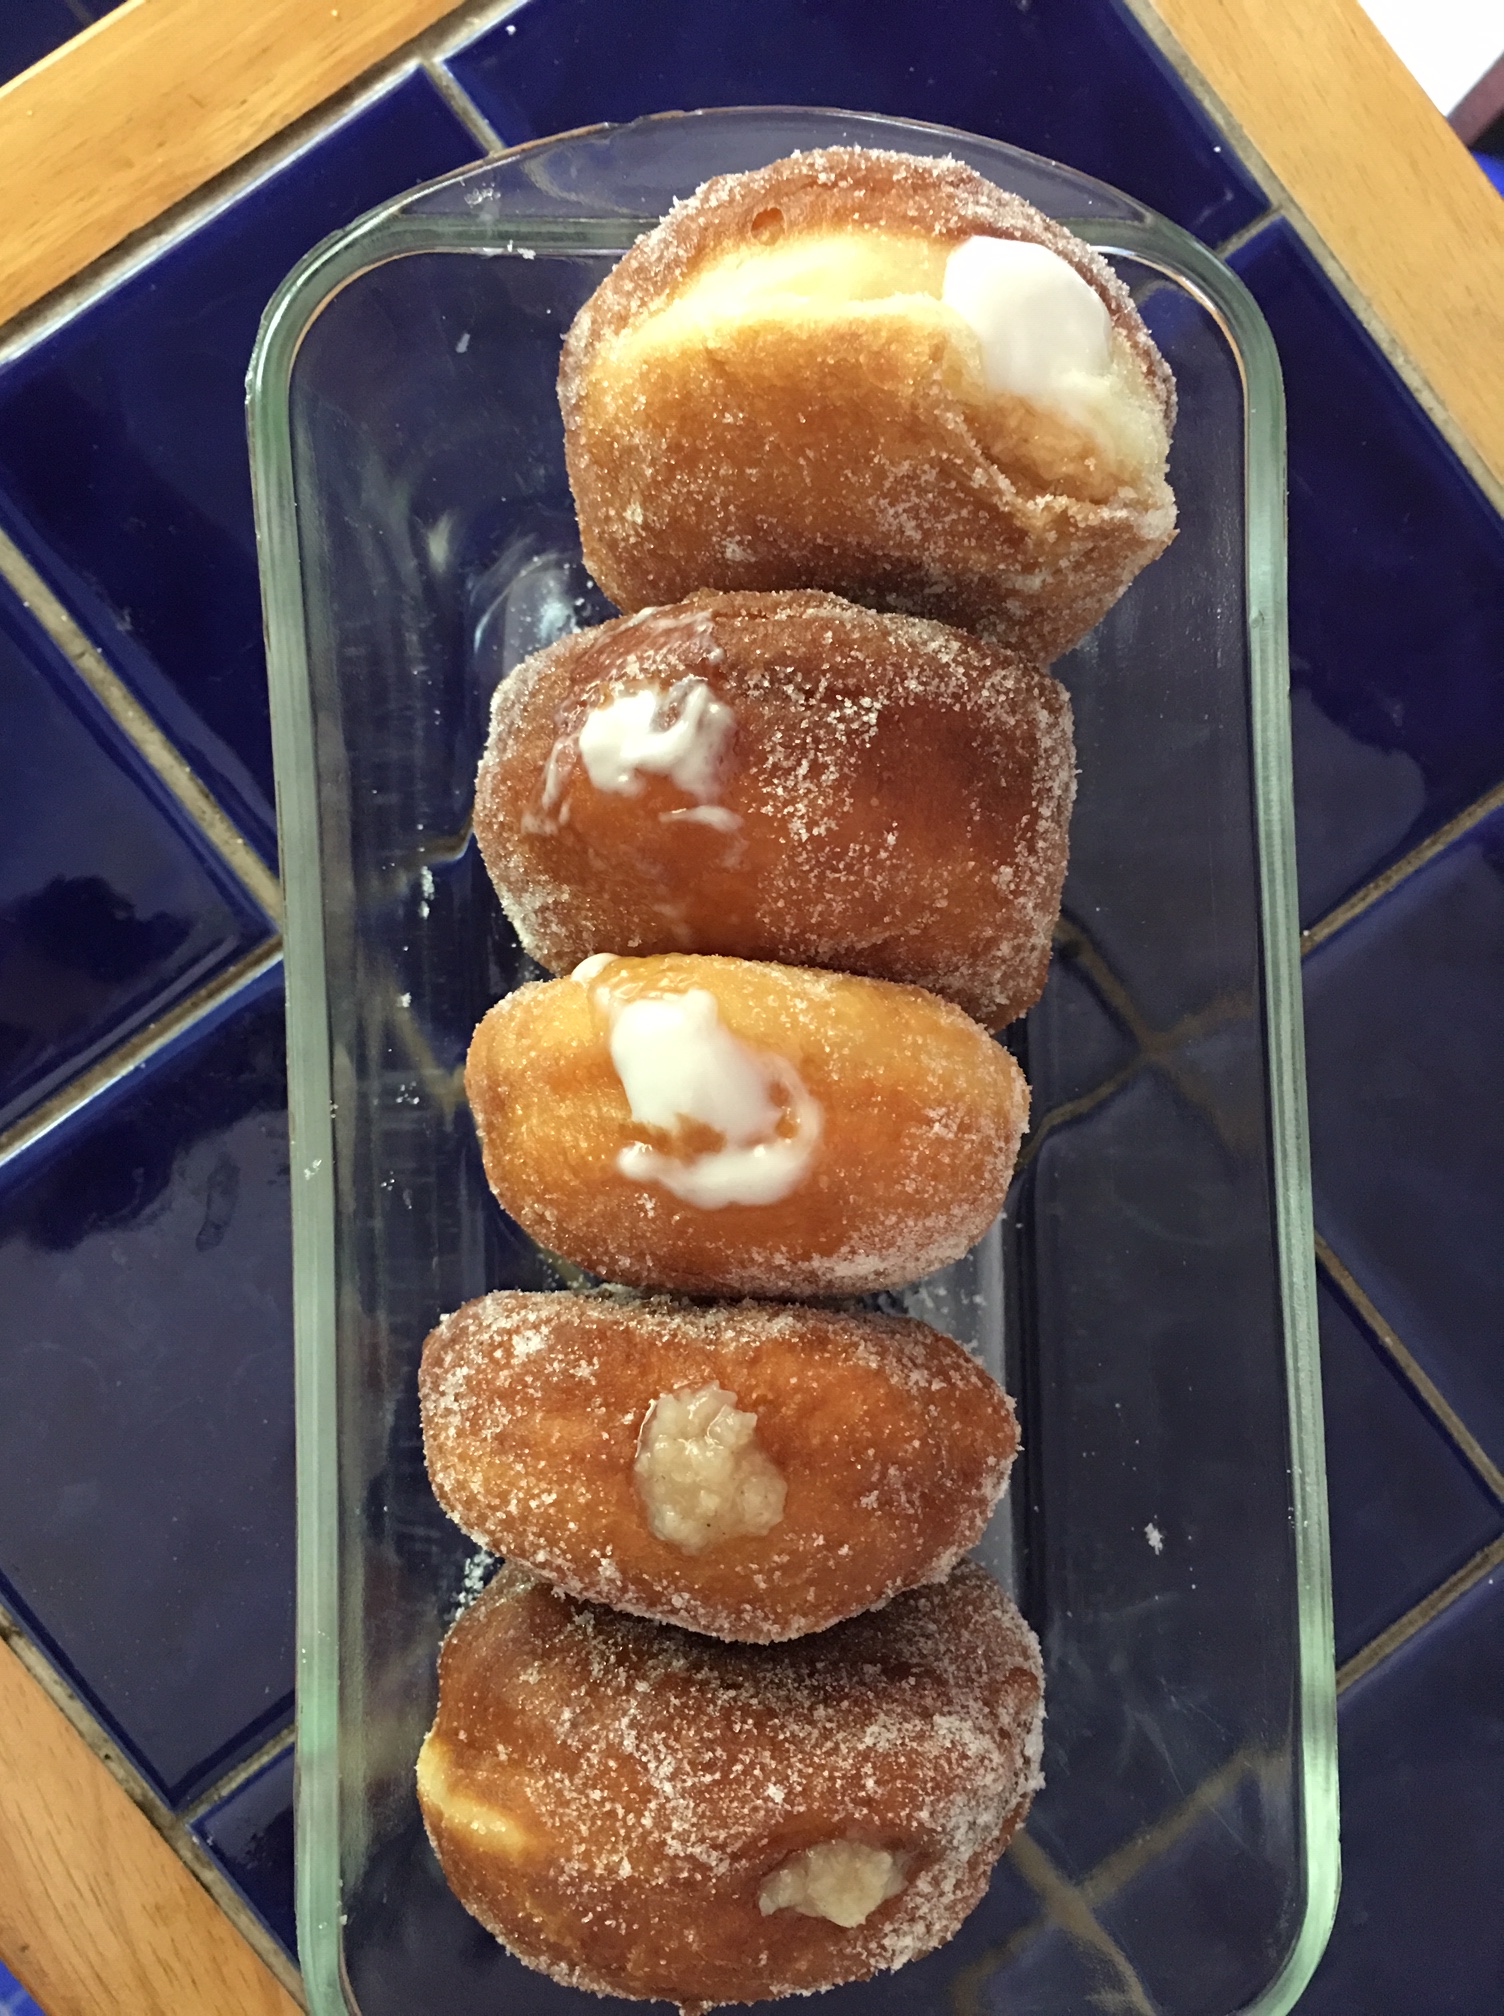
I’ve been experimenting with yeast-y things like doughnuts–because they’re fun. I found this recipe from NY Times Cooking, and it looked straightforward enough. However, my first batch was a disaster because I forgot the eggs. So I started over with another batch but could not get the dough to clean the sides of the mixing bowl. It was horribly sticky. I ended up adding 10 tablespoons flour, 2 at a time, to the mixer and when it started to come together, dumped it out onto a floured board where I added 2 more tablespoons of flour because it was still unmanageable. I was sure the doughnuts were inedible, so I was pleasantly surprised when they turned out soft, pillowy, and tender. I made a few with blueberry jelly–it was all I had in the pantry. Feeling bolder, I made a third batch and experimented with two different fillings: young coconut cream and spiced jujube compote. I still have to work on my technique; getting an even color in frying and making fillings that are strong enough in flavor to stand out. This is a work in progress! So here is Mr. Bittman’s recipe with my notes attached:
Reading from top to bottom: doughnuts filled with young coconut cream and spiced jujube compote
Jelly Doughnuts (Mark Bittman at NY Times Cooking)
Yield: 12 doughnuts
Time: 3 hours
1 1/4 cups whole milk
2 1/4 teaspoons active dry yeast
2 eggs, room temperature
8 tablespoons (110 g) unsalted butter, melted and cooled
1/4 cup caster sugar plus 1 teaspoon
1 teaspoon salt
4 1/4 cups (544 g) all purpose flour, plus more for rolling out the dough
2 quarts vegetable oil for frying, plus more to oil the bowl
1/4 cup granulated sugar for coating the fried doughnuts
Special equipment: a candy thermometer, piping bag
Heat the milk until it reaches a temperature of 90˚F/32˚C. In the mixing bowl of a stand mixer, pour in the milk and combine it with the yeast. Stir lightly and let sit until the mixture becomes foamy on top, 5-7 minutes.
To the yeast mixture, add the eggs, melted butter, 1/4 cup sugar, salt. Fit the dough hook attachment to the mixer. Add 2 cups plus 2 tablespoons of the flour (272 g) and beat until combined. Add the rest of the flour mixing until the dough pulls away from the sides of the bowl. .If the dough is too wet, Mr. Bittman says, add more flour, 2 tablespoons at a time.
Baker’s Note: Unfortunately, he doesn’t say how much flour is the maximum allowed, but I added 10 tablespoons without detriment.
If the dough becomes too thick to beat, transfer it to a floured surface and gently knead it until smooth. Grease a large bowl (aka the mixing bowl) with a teaspoon of oil. Transfer the dough to the bowl and cover it. Let rise at room temperature until it doubles in size, about 1 hour.
Baker’s Note: I’ve used the microwave oven (off, of course) as a proofing box. Put the covered bowl in the microwave with a cup of boiling water to create a humid environment.
While the dough is proofing in the bowl, prepare the fillings (see note at the bottom How to Prepare Jelly Fillings for Filled Doughnuts). Line two baking trays with parchment paper that has been generously sprinkled with flour. You don’t want the risen doughnuts to stick to the paper, as they can become misshapen and deflate when you transfer them from the tray to the hot oil.
Baker’s Note: I saw a YouTube video with Michael Lim who put each doughnut on individual squares of unfloured parchment to rise. Once risen, he slipped the doughnut on the paper into the hot oil. The paper slipped off during frying and he simply fished it out.
Turn the dough out onto a well-floured surface, and sprinkle a little flour on top. Because I have a small work surface, I cut the dough ball in half and put one half back in the bowl covered with plastic. Then roll the dough out on the work surface to 1/2 inch thickness. Use a 3 inch cookie cutter to cut out the circles. I used a 4 inch cookie cutter to cut out 8 circles. Don’t twist the cutter because you want to get a straight edge for the doughnuts to puff up when they fry. Gently knead any scraps together to form a ball, and let it rest, covered with plastic, for 30 minutes before cutting out more dough circles. These re-kneaded scraps will not have the height of the first roll-out of doughnuts. Repeat with remaining dough.
Baker’s Note: Lesson: try and get as many doughnuts as possible from the first roll.
Put the cut dough circles on the prepared baking sheets so that there is at least an inch of space between each circle. Cover with a kitchen towel, and let rise in a warm place until they are slightly puffed up, about 45 minutes. The baking trays won’t fit in the microwave oven, so if your kitchen isn’t warm, heat the oven to 200˚F/93˚C. Turn off the oven and put the baking sheets inside, leaving the oven door slightly ajar.
Fifteen minutes before the dough has completed its second rise, heat the oil in a heavy bottomed pot or Dutch oven over medium heat to a temperature of 375˚F/191˚C. Prepare a large platter layered with paper towels to drain the hot doughnuts. Fill a shallow bowl with 1/4 cup sugar to coat the hot doughnuts. Prepare 3-4 loaf pans for stacking the sugared filled doughnuts.
Baker’s Note: It’s a lot of oil, I know. Anybody knows how long to store used oil?
Use a metal spatula to lift the delicate risen doughnuts from the parchment and slip them into the hot oil. Depending on the size of your pot, add 4-6 doughnuts at a time. They should not crowd each other. After 45 seconds to a minute, when the bottoms are deep golden, flip the doughnuts over to cook the other side for 30 seconds. When the doughnuts are golden brown on the second side, use a skimmer or a spider to remove them from the hot oil to the paper-towel lined platter to cool.
When the doughnuts have cooled for about a minute, coat them in sugar and stack them in a loaf pan to await filling. You want to sugar the doughnuts while they are still hot so the sugar adheres to the surfaces.
Baker’s Note: After frying a batch of doughnuts, pause to let the oil come back up to temperature. While the oil is heating up again, sugar the doughnuts.
Fill the doughnuts about 10 minutes after they have been coated with sugar, when they will be cool enough to handle. Make sure the fillings are at room temperature. To fill the doughnuts, use a chopstick or a plastic straw to make a hole in the side of the fried doughnut. Wiggle it around slightly to enlarge the hole, but be careful not to pierce through the doughnut. Snip off the tip of the piping bag and fill. Insert the tip into the hole and squeeze the piping bag gently until some of the filling just oozes out the top of the filled doughnut. Stack the filled doughnuts upright back in the loaf pan to keep the filling from dripping out and letting the doughnut finish cooling
Baker’s Note: If you haven’t got a small round icing tip for filling the doughnuts, some people improvise with a two-inch tip of a plastic straw. However, it doesn’t work with jelly fillings which are viscous. I did not use any icing tip for the second batch of doughnuts. I found the filled piping bag was stiff enough; just squeeze the filling from the top to the tip.
How to Prepare Jelly Fillings for Filled Doughnuts:
The easiest filling of all to use is a jar of jam, jelly, or preserves. Spoon the jam, jelly, or preserves into a small saucepan to heat until it becomes a thick liquid. If using jam or preserves that have fruit pieces in them, strain the heated liquid and discard the fruit pieces. Spoon the thickened liquid into a piping bag and let it rest on a plate to cool to room temperature. Use a tie clip to cover the top so the filling won’t spill out. Don’t snip the end of the bag until ready to fill the doughnuts.
Note: my test audience (my family) did not like the coconut cream and spiced jujube fillings so I have not included the recipes for those fillings here. Back to the stovetop to experiment!